Your vehicle’s braking system is one of its most critical safety components, and clean brake fluid is essential for maintaining proper braking performance. Over time, brake fluid can absorb moisture, accumulate debris, and lose effectiveness, which can compromise your brakes and increase stopping distances.
In this guide, you’ll learn how to flush brake fluid in 5 easy steps, why it’s important, and tips for keeping your braking system safe and reliable.
Why Flushing Brake Fluid Is Important
Brake fluid plays a critical role in hydraulic braking systems. It transmits force from the brake pedal to the calipers, which then apply pressure to the brake pads. Over time, brake fluid can:
- Absorb moisture, lowering its boiling point
- Become contaminated with debris or rust
- Lead to spongy brake feel or reduced braking efficiency
- Cause corrosion inside brake lines and components
Flushing the brake fluid periodically helps maintain braking performance and prolongs the life of brake components.
Tools and Materials You’ll Need
Before starting, gather these essential tools:
- Fresh brake fluid (check your vehicle manual for the correct type)
- Brake bleeder kit or tubing and container
- Wrenches for bleeder valves
- Jack and jack stands
- Wheel chocks
- Gloves and safety glasses
- Clean rags
Proper preparation ensures a safe and effective brake fluid flush.
Step 1: Prepare Your Vehicle
- Park your vehicle on a flat surface.
- Engage the parking brake and use wheel chocks to secure the wheels.
- Lift the car using a jack and secure it on jack stands for safety.
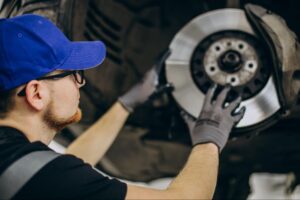
- Remove the wheels to access the brake calipers and bleeder valves.
Safety is crucial when working with hydraulic components.
Step 2: Locate the Master Cylinder and Bleeder Valves
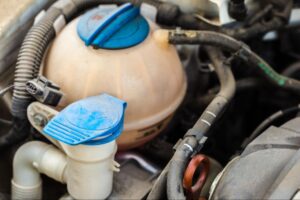
The brake master cylinder is usually located near the firewall on the driver’s side.
- Check the fluid level and condition in the reservoir.
- Locate the bleeder valves on each wheel caliper or wheel cylinder.
Knowing the correct location of these components ensures an organized flush process.
Step 3: Remove Old Brake Fluid
Brake fluid flushing typically uses a “top-down” method, starting from the wheel farthest from the master cylinder.
- Attach a clear tube to the bleeder valve and place the other end in a container.
- Loosen the bleeder valve slightly.
- Have an assistant slowly press the brake pedal while you open the valve to release old fluid.
- Close the valve before releasing the pedal.
Repeat for all four wheels, ensuring the old fluid is fully removed.
Step 4: Add Fresh Brake Fluid
After removing the old fluid:
- Refill the master cylinder with fresh brake fluid to the recommended level.
- Repeat the bleeding process at each wheel to replace remaining old fluid with new fluid.
- Maintain proper fluid levels in the master cylinder throughout the process.
This step ensures that the system is completely free of contaminated fluid.
Step 5: Check for Air and Test Brakes
After flushing all four wheels:
- Pump the brake pedal several times to check for a firm pedal feel.
- Inspect all bleeder valves and brake lines for leaks.
- Reinstall wheels, lower the vehicle, and perform a slow test drive to ensure proper braking performance.
Any sponginess in the pedal may indicate trapped air, requiring additional bleeding.
Signs You May Need a Brake Fluid Flush
Brake fluid should generally be replaced every 2–3 years, but you may need a flush sooner if you notice:
- Soft or spongy brake pedal
- Reduced braking performance
- Dark, dirty brake fluid in the reservoir
- Brake warning light illuminated
- Corrosion in brake components
Early detection can prevent costly repairs and maintain safety.
Tips for Maintaining Your Braking System
- Always use the manufacturer-recommended brake fluid type.
- Inspect fluid condition periodically.
- Avoid introducing moisture during the refill process.
- Replace worn brake pads and rotors as part of regular maintenance.
- Schedule routine brake inspections with a certified mechanic.
Preventive maintenance keeps your brakes safe and reliable for years.
Performing a brake fluid flush is an essential maintenance task that ensures your braking system operates at peak efficiency. By following these 5 steps, you can remove contaminated fluid, prevent corrosion, and maintain a firm brake pedal for safe driving. Regular inspections and fluid replacement are key to keeping your vehicle safe on the road.
Clean brake fluid is not just about performance—it’s about safety for you and everyone on the road.
At Express Auto Care, drivers can access fast, professional automotive maintenance and repair services designed to help keep vehicles performing efficiently. Their service offerings include oil changes, brake replacement, transmission service, radiator flushes, serpentine belt inspections, A/C service, fuel system cleaning, and more.
You can explore their full list of maintenance and repair solutions here:
Taking care of your vehicle today can help you avoid unexpected breakdowns tomorrow.